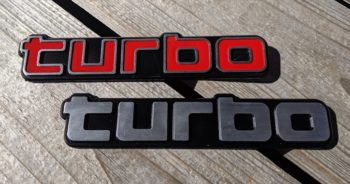

Universal Turbo Badge
This is an aluminum retro “Turbo” badge. This is inspired by the “Turbo” badge Toyota made in the 1980s. It can mount to any flat surface on the vehicle. Will come with 1-2 strips (depending on size) of 3M automotive adhesive to mount to the vehicle. There are 2 sizes and two color options for each size for a total of 4 options. There is the 7″ and 5″ black/silver badges. There is also the 7″ and 5″ black/silver/red badges.
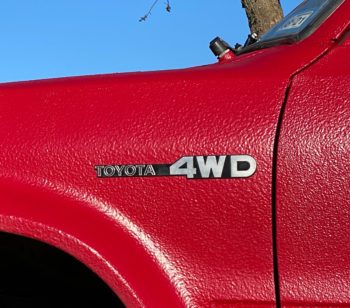
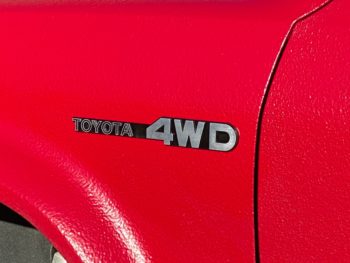
1979-1983 Toyota Pickup Fender Badge (Universal Fit)
This is a machined aluminum badge with a satin brushed finish on the lettering. This is not a plastic replica like the OEM badge was. This badge is an exact match in size to the original factory badge and mounts with strips of 3M automotive badge/decal adhesive. No drilling of the fenders is needed. The overall length is exactly 10″ (254mm) by 1.4″(36mm) tall. This badge will fit in the factory fender location of the 1979-1983 Toyota pickup BUT it can also mount to any flat surface of any Toyota. It can be mounted on a surface like a flat tailgate of a more modern vehicle giving it that old school retro look.
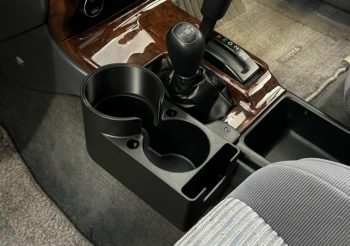
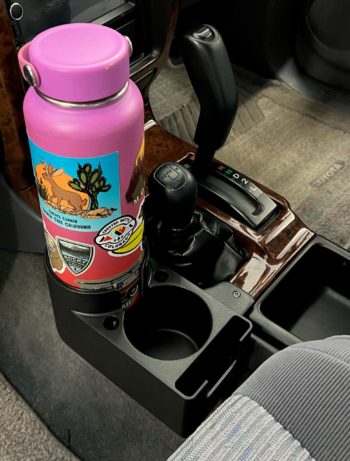
Hilux Surf Double Cup Holder 1996-2002
This is a 3D printed double cup holder for the 1996-2002 Toyota Hilux Surf. This will work on the 4WD automatic console. This will NOT fit on the manual transmission console. That design in still in development. This cup holder is made of ABS plastic and comes in flat black only. This design one large hole with removable snap ring, one smaller hole, and a cell phone slot . The large hole with snap ring removed can accept the newest 36oz. Yeti bottle. With the snap ring in place the cup holder will hold a Nalgene and 32/40oz. Hydroflask. The smaller standard 3″ hole will accept most fast food style containers. This design will hold just about any container on the market. Be aware, this design prevents full forward movement of the passenger seat. The front 3″ of movement will be blocked by the cup holder.
Install Instructions
There are 2 strips of 3M automotive adhesive already attached to help with install. Make sure the surface attaching to is totally clean. Once stuck in place with the adhesive then you will want to use the 2 provided self-taping screws in the side and top hole. Use a hand screw driver and not a power drill so you don’t strip the hole.